Securing Hangfire Dashboard in ASP.NET Core with a Custom Auth Policy
This blog post assumes that you have a basic understanding of Hangfire. If not, you can follow their excellent guide on how to get started. The scope of this blog post is to show you how to secure the Hangfire Dashboard and only authorise certain users to be able to access it without opening it up to the general public.
By default, if you try to access your Hangfire dashboard, it will work perfectly fine on your localhost because local requests are allowed. However, things can get a bit tricky when you want to secure your Dashboard.
For starters, Hangfire provides us with a IDashboardAuthorizationFilter to perform our custom authorisation when deployed. But, what if we want to do the authorisation at an endpoint level rather than using a custom filter?
Step 1 - Initial Setup
To get started, you can clone the repo I have put together:
To summarise, the above solution is a .NET Core 3.1 Web API project and has the following dependencies.
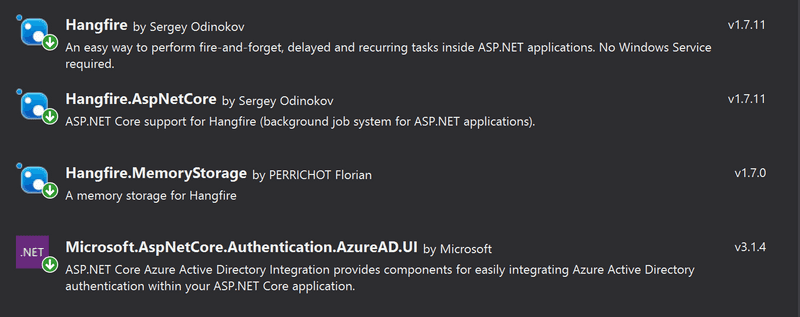
We use MemoryStorage since we don’t want to persist anything for this demo. This will work just fine with SQLStorage. To keep things simple on the authentication side of things, I have used AzureAD.UI library.
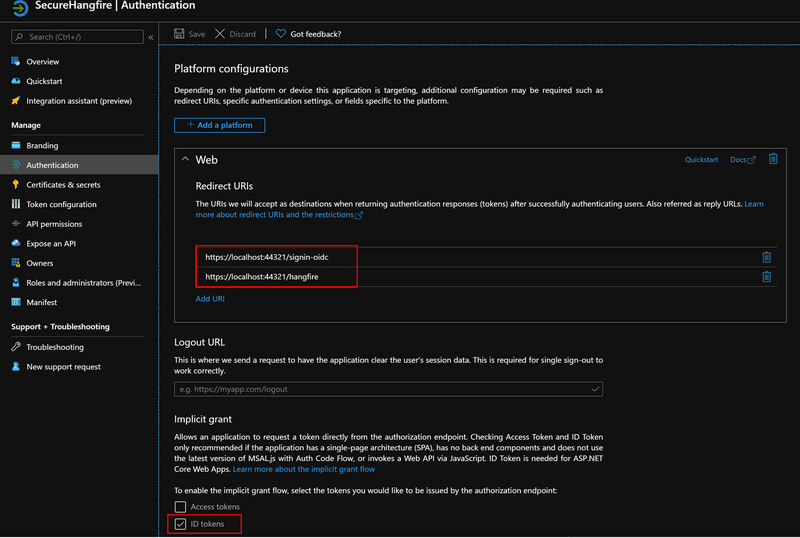
Once you have cloned the repo, do not forget to create an app registration in the Azure portal, under Active Directory. Make sure you have set the correct Redirect URIs (Note: we need to add hangfire URI) and selected ID tokens.
You also need to copy and paste the ClientId and TenantId from your app registration to appsettings.json
"AzureAd": {
  "ClientId": "Enter_the_Application_Id_here",
  "TenantId": "Enter_the_Tenant_Info_Here"
}
Once you have done this setup, you can just press F5 and head over to https://localhost:44317/hangfire to see if everything is working.
Step 2 - Adding a custom authorisation policy
For our server to tell which policy to use to authorise users to access the Hangfire dashboard, we need to define a custom authorisation policy.
public void ConfigureServices(IServiceCollection services)
{
    // Add Authentication

    ...Code removed for brevity

    // Add a new policy for hangfire
    services.AddAuthorization(options =>
    {
        // Policy to be applied to hangfire endpoint
        options.AddPolicy(HangfirePolicyName, builder =>
        {
            builder
                .AddAuthenticationSchemes(AzureADDefaults.AuthenticationScheme)
                .RequireAuthenticatedUser();
        });
    });

    ...Code removed for brevity

    // Bootstrap Hangfire
    services.AddHangfire(configuration => configuration
        .SetDataCompatibilityLevel(CompatibilityLevel.Version_170)
        .UseSimpleAssemblyNameTypeSerializer()
        .UseRecommendedSerializerSettings()
        .UseMemoryStorage());
}
Step 3 - Securing the Dashboard
Now that we have defined our custom authorisation policy, let’s configure our Hangfire dashboard endpoint to require authorisation with our HangfirePolicyName policy.
public void Configure(IApplicationBuilder app, IWebHostEnvironment env)
{
    ...Code removed for brevity

    // Hangfire Settings
    app.UseHangfireServer();
    app.UseHangfireDashboard();

    // Configure endpoints
    app.UseEndpoints(endpoints =>
    {
        endpoints.MapControllers();
        endpoints.MapHangfireDashboard("/hangfire", new DashboardOptions()
        {
            Authorization = new List<IDashboardAuthorizationFilter> { }
        })
        .RequireAuthorization(HangfirePolicyName);
    });

    //Register our background job
    RecurringJob.AddOrUpdate("some-id", () => Console.WriteLine(), Cron.Minutely);
}
It is important to remember that we need to pass in an empty list of IDashboardAuthorizationFilter because otherwise, Hangfire will block all your requests to the dashboard when deployed (i.e. works only on localhost if we don’t override it like this).
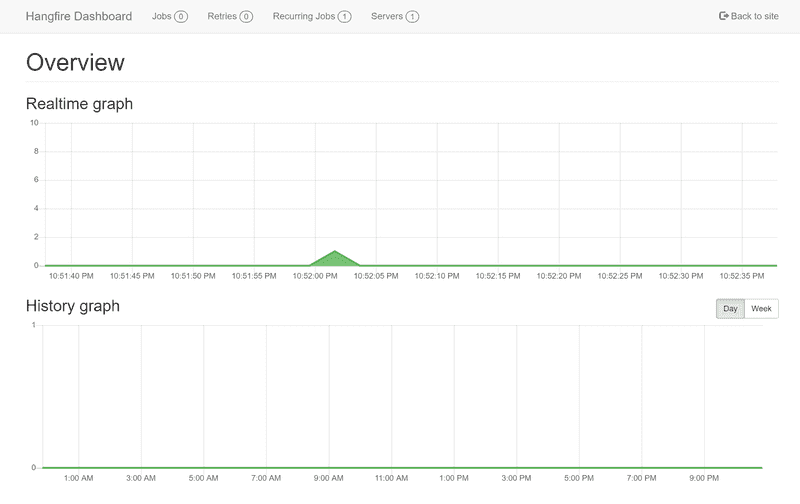
Now head over to https://localhost:44317/hangfire you will be asked to login since our new hangfire dashboard endpoint is secured with Azure AD. Once you log in, you will see the dashboard.
Step 4 - Requiring a Specific Role
We can also add custom role checks inside our AddPolicy() call. This is quite useful and a more secure way to protect your Hangfire Dashboard endpoint rather than granting access all authenticated users of your system.
...
services.AddAuthorization(options =>
    {
      // Policy to be applied to hangfire endpoint
      options.AddPolicy(HangfirePolicyName, builder =>
      {
        builder
          .AddAuthenticationSchemes(AzureADDefaults.AuthenticationScheme)
          .RequireAuthenticatedUser();

        // Your custom role check
        if (env.IsProduction())
        {
          builder.RequireRole("AdministratorRoleName");
        }
      });
    });
...
Conclusion
With this approach, you can have a nicely decoupled way of protecting your Hangfire dashboard route. You can also move the authorisation logic to a custom extension method and inject your custom services as opposed to using a Hangfire’s authorisation filter.
There’s a pull request in Hangfire repository to add an extension method to add authorisation policy support by a colleague of mine. Feel free to upvote it 🙂
💡 UPDATE: The above PR has gone in and the new extension method will be available as part of 1.7.24 release.
References
- https://docs.microsoft.com/en-us/aspnet/core/fundamentals/routing?view=aspnetcore-3.1
- https://docs.microsoft.com/en-us/azure/active-directory/develop/quickstart-v2-aspnet-core-webapp#option-2-register-and-manually-configure-your-application-and-code-sample
- https://docs.hangfire.io/en/latest/configuration/using-dashboard.html