Building your own private Kubernetes cluster on a Raspberry PI 4 with K3S
Updated · originally #kubernetes#k3s#raspberry-pi#home-lab7 min read
In this article, we will look at setting up your own private Kubernetes cluster on a Raspberry Pi using K3S in your home Wi-Fi network! Our setup will be pretty simple - single master and a single worker node. You can always add more nodes if you like.
Here’s a diagram to give you an idea of what we will be building today.
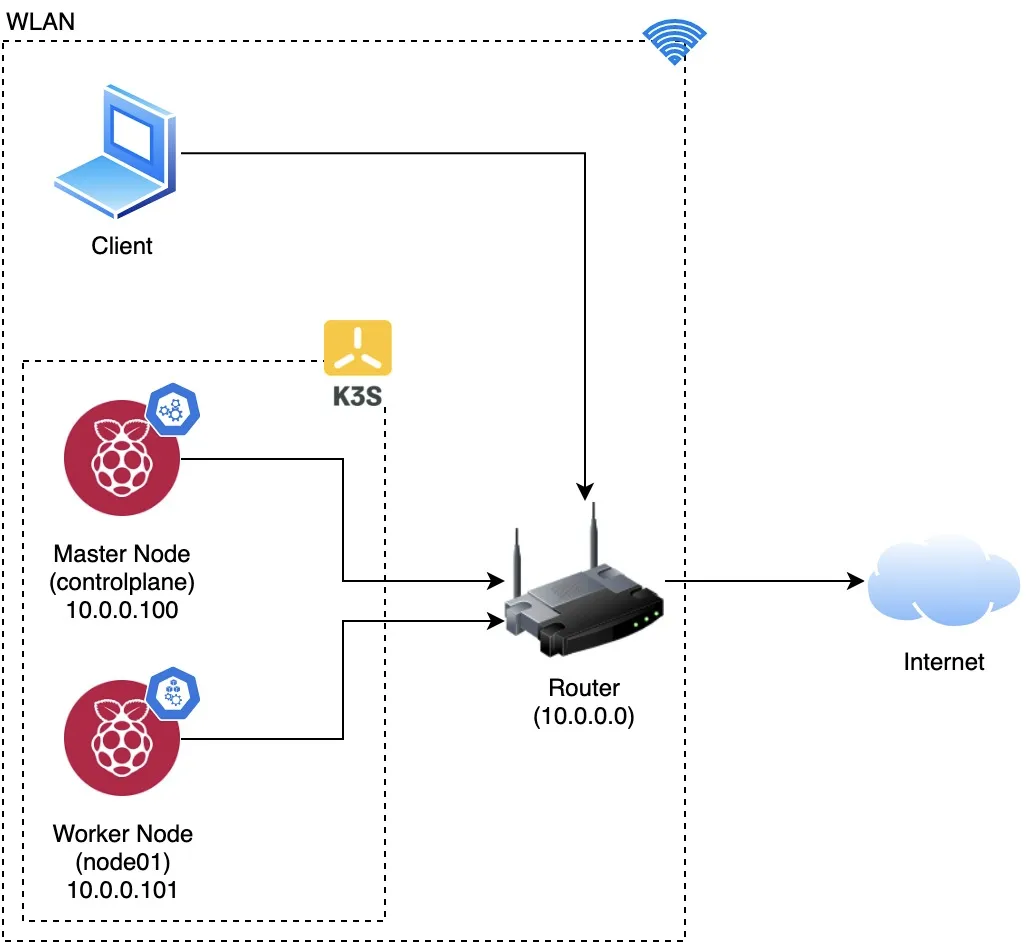
Basically, we’ll be tying two Raspberry Pis together with K3S and connecting them to a local WLAN. We can then deploy our workloads using a client (your laptop) which will be talking to the Kubernetes API just as you’d normally with any other K8S cluster.
Note that the local addresses shown in this post might be different what you have got in your home network.
A faster way to do steps 1, 3 and 8
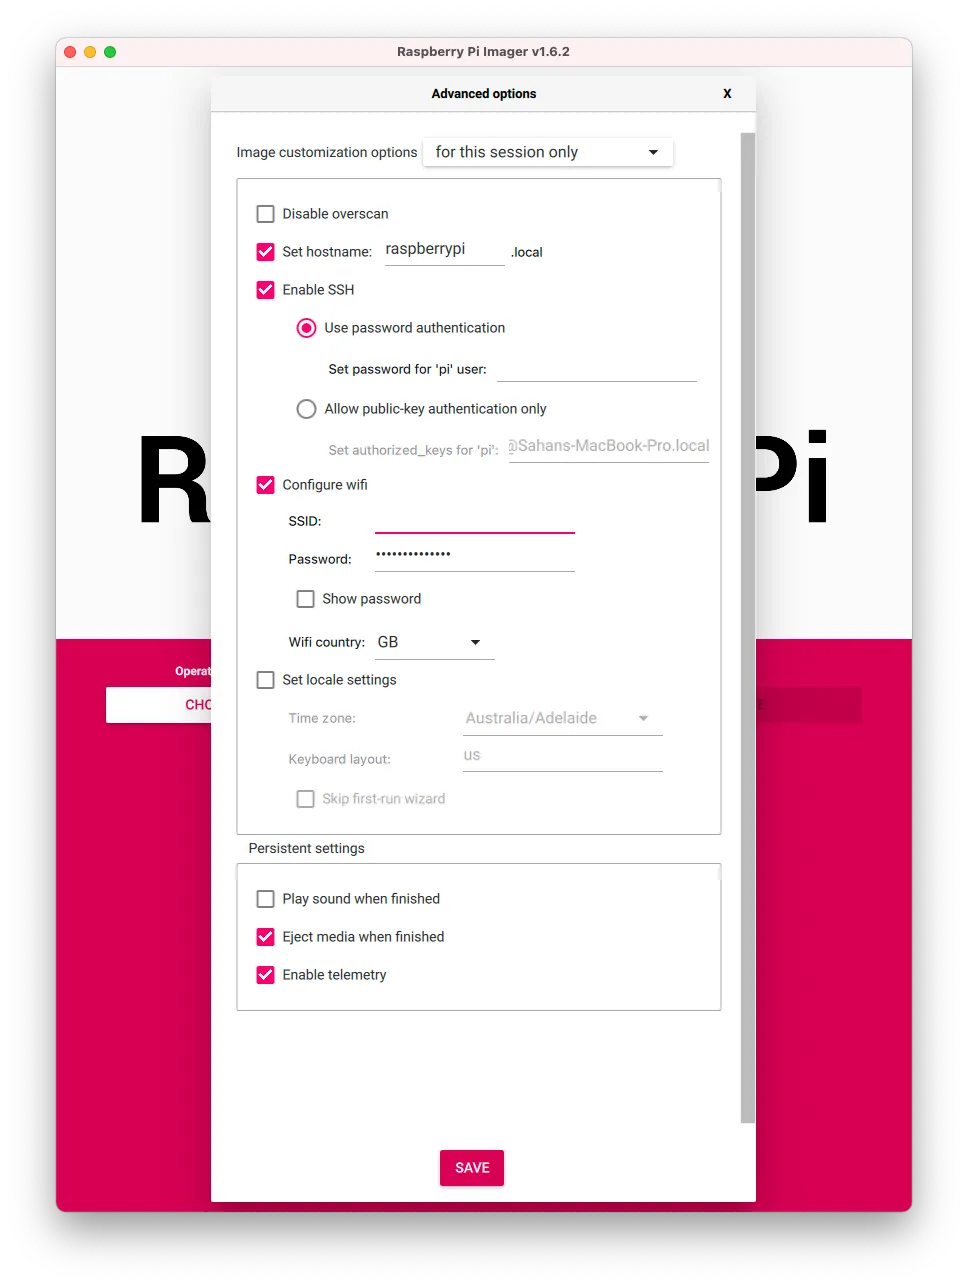
Raspberry Pi Imager can enable ssh and set the hostname and wireless credentials before it flashes the card. Press Cmd+Shift+X (macOS) or Ctrl+Shift+X (Windows) to open the Advanced options window. That makes steps 1, 3 and 8 below redundant, though I have kept them for anyone who would rather do them by hand. Thanks to Chris Carr for the tip.
Step 0 - The initial setup
First, we need to set up the Raspberry Pis to have an OS, enable SSH, little bit of configuration to be able to use K3S.
💡 If you haven’t done a setup on Raspberry Pi in headless mode before, I have a post describing just that. Note that this is for Desktop version if you want to use them for other stuff as well. That post can be found here: Setting up your Raspberry PI 4 - Headless mode
I have listed down the specs and the OS versions I used for my kit.
- 2 x Raspberry Pi 4 Model B - 4GB RAM
- 2 x 128GB Micro SD Cards
- Raspbian OS Lite edition (based on Debian Buster)
- Stackable case
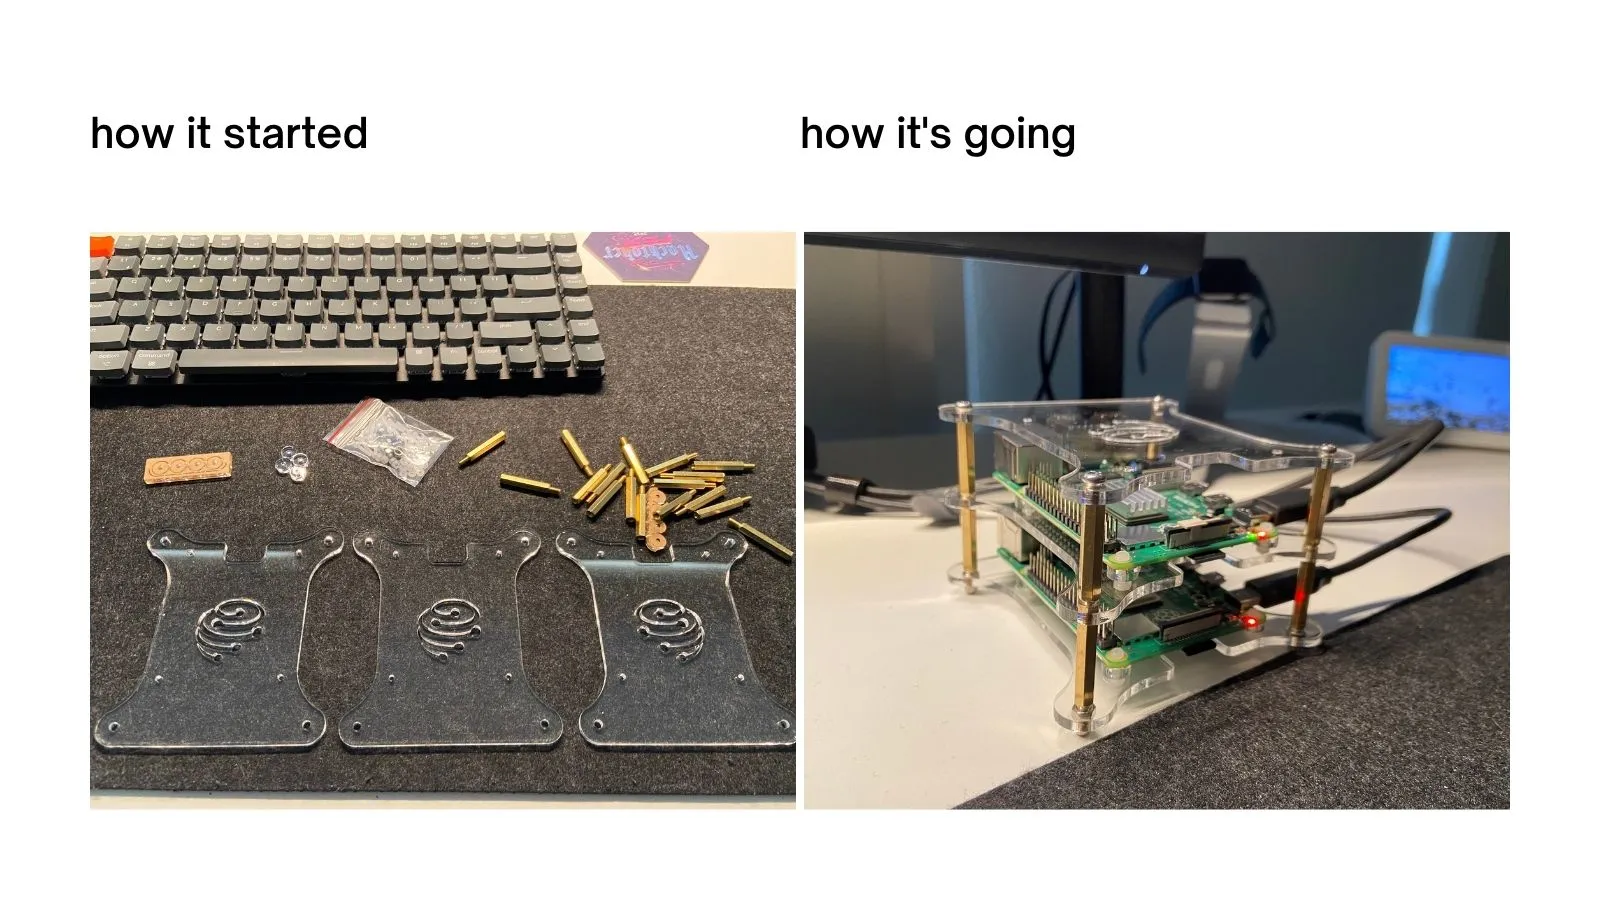
Here’s a sneak peek of my build ✌️
You can now use Raspberry Pi Imager without using Balena Etcher to flash the micro SD card. This will make selecting the OS version and flashing process easier.
In summary, we will be looking at doing the following steps.
💡 You need to do the following configs to both (or more) of your Raspberry PIs
- Enable
sshon both RPIs (manual) - Enable cgroups
- Set up wireless (manual)
- Enable 64-bit mode at the kernel level
- Booting up
- Set up IP tables
- Assign static IPs
- Change the hostnames (manual)
- Install K3S Server on Master
- Install K3S Agent on Worker
Before booting up, we need to do a couple of configurations as mentioned below.
Step 1 - Enable SSH (Manual)
Open up the root of the micro SD card (this would be mounted as boot) you just flashed. Create a blank file named ssh at the root of that folder.
touch sshStep 2 - Enable cgroups
cgroups is an essential kernel level feature which underpins the containerisation technology. This allows the processes to run in isolation with a specific set of resource assigned to it.
Let’s open up the root of the micro SD volume (this would be mounted as boot) you just flashed and edit the cmdline.txt file.
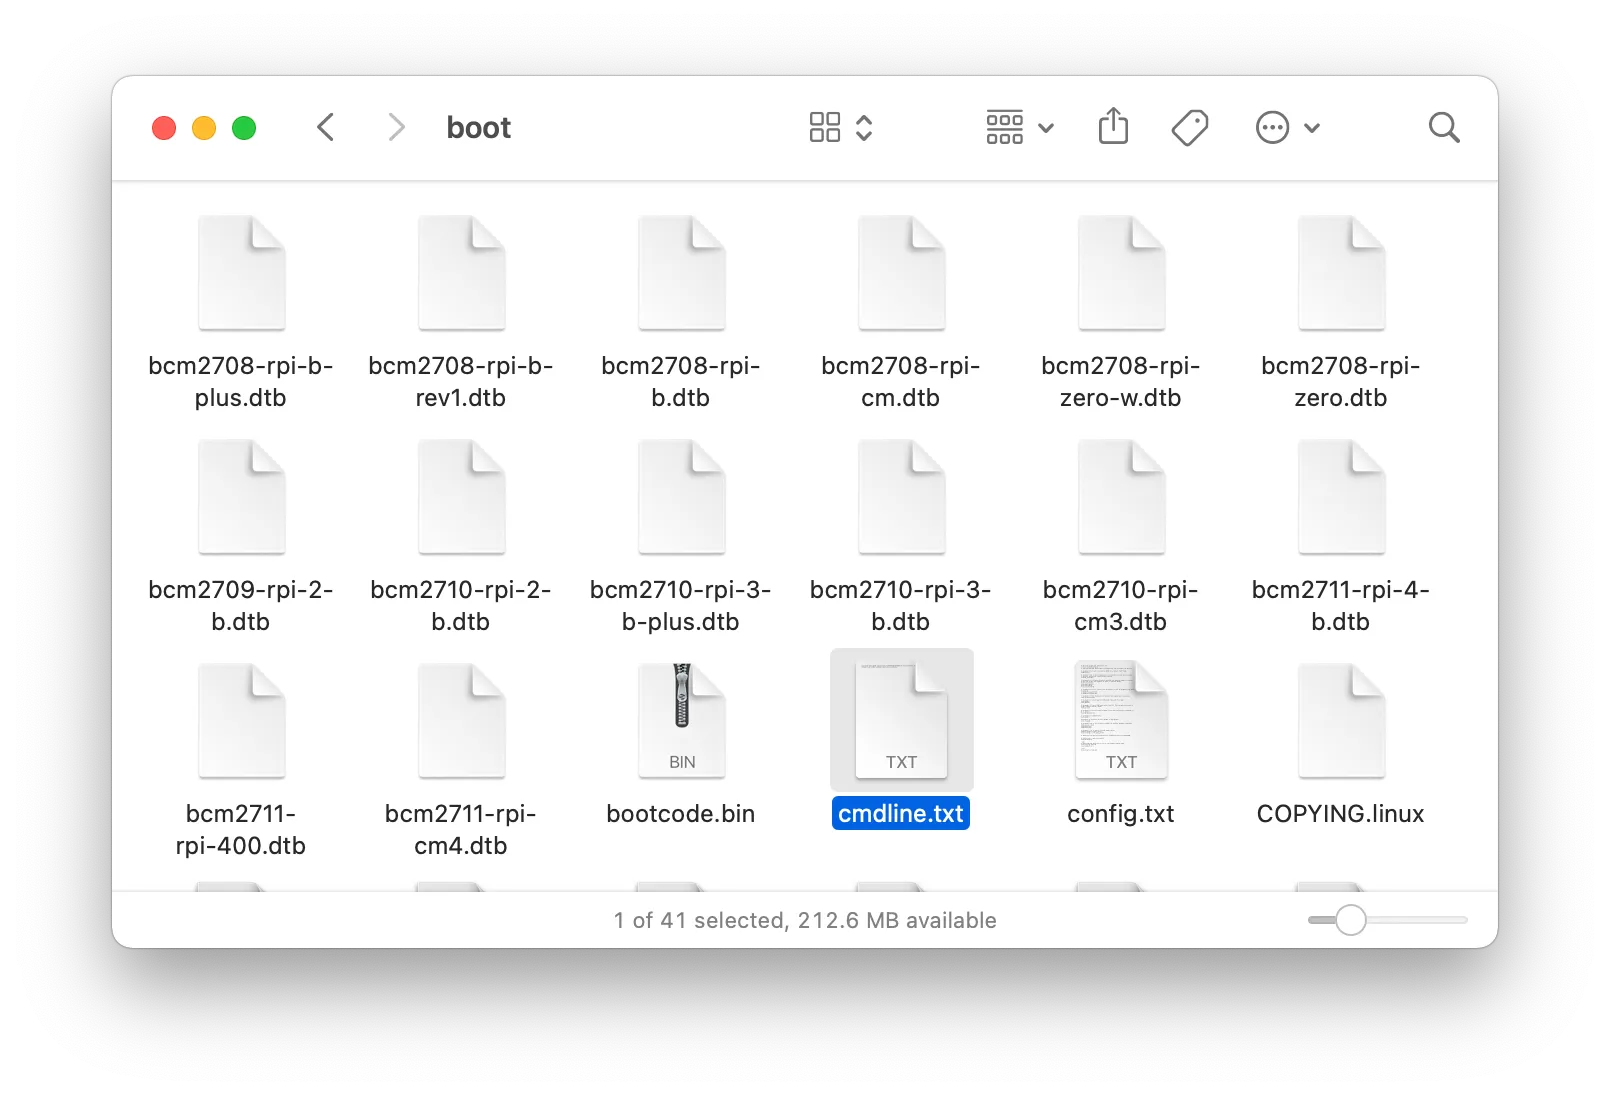
Add the following line to the end of the file.
cgroup_memory=1 cgroup_enable=memoryYou might be wondering why are we doing this. Here’s an excerpt from the K3S docs:
💡 Standard Raspbian Buster installations do not start with
cgroupsenabled. K3S needscgroupsto start thesystemdservice.cgroupscan be enabled by appendingcgroup_memory=1 cgroup_enable=memoryto/boot/cmdline.txt
Step 3 - Setting up wireless mode (Manual)
I don’t carry around my Raspberry Pi setup 😆, so I opted in to use my home Wi-Fi network instead of ethernet. Here’s how I did it.
While at the root of the /boot/ volume, create a new file called wpa_supplicant.conf file and add the following lines to it.
country=AU
ctrl_interface=DIR=/var/run/wpa_supplicant GROUP=netdev
update_config=1
network={
    ssid="your-networks-SSID"
    psk="your-networks-password"
}
Take a note of the country field (you can find them in here), and make sure to replace that with the corresponding country code that suits you. ssid and psk would be the name of your wireless network and the password, respectively.
Step 4 - Run the kernel in 64-bit mode
Next up, we will tell the Raspbian OS to run the kernel in 64-bit mode. This is required for K3S.
Open the config.txt file and add the following line to the bottom.
arm_64bit=1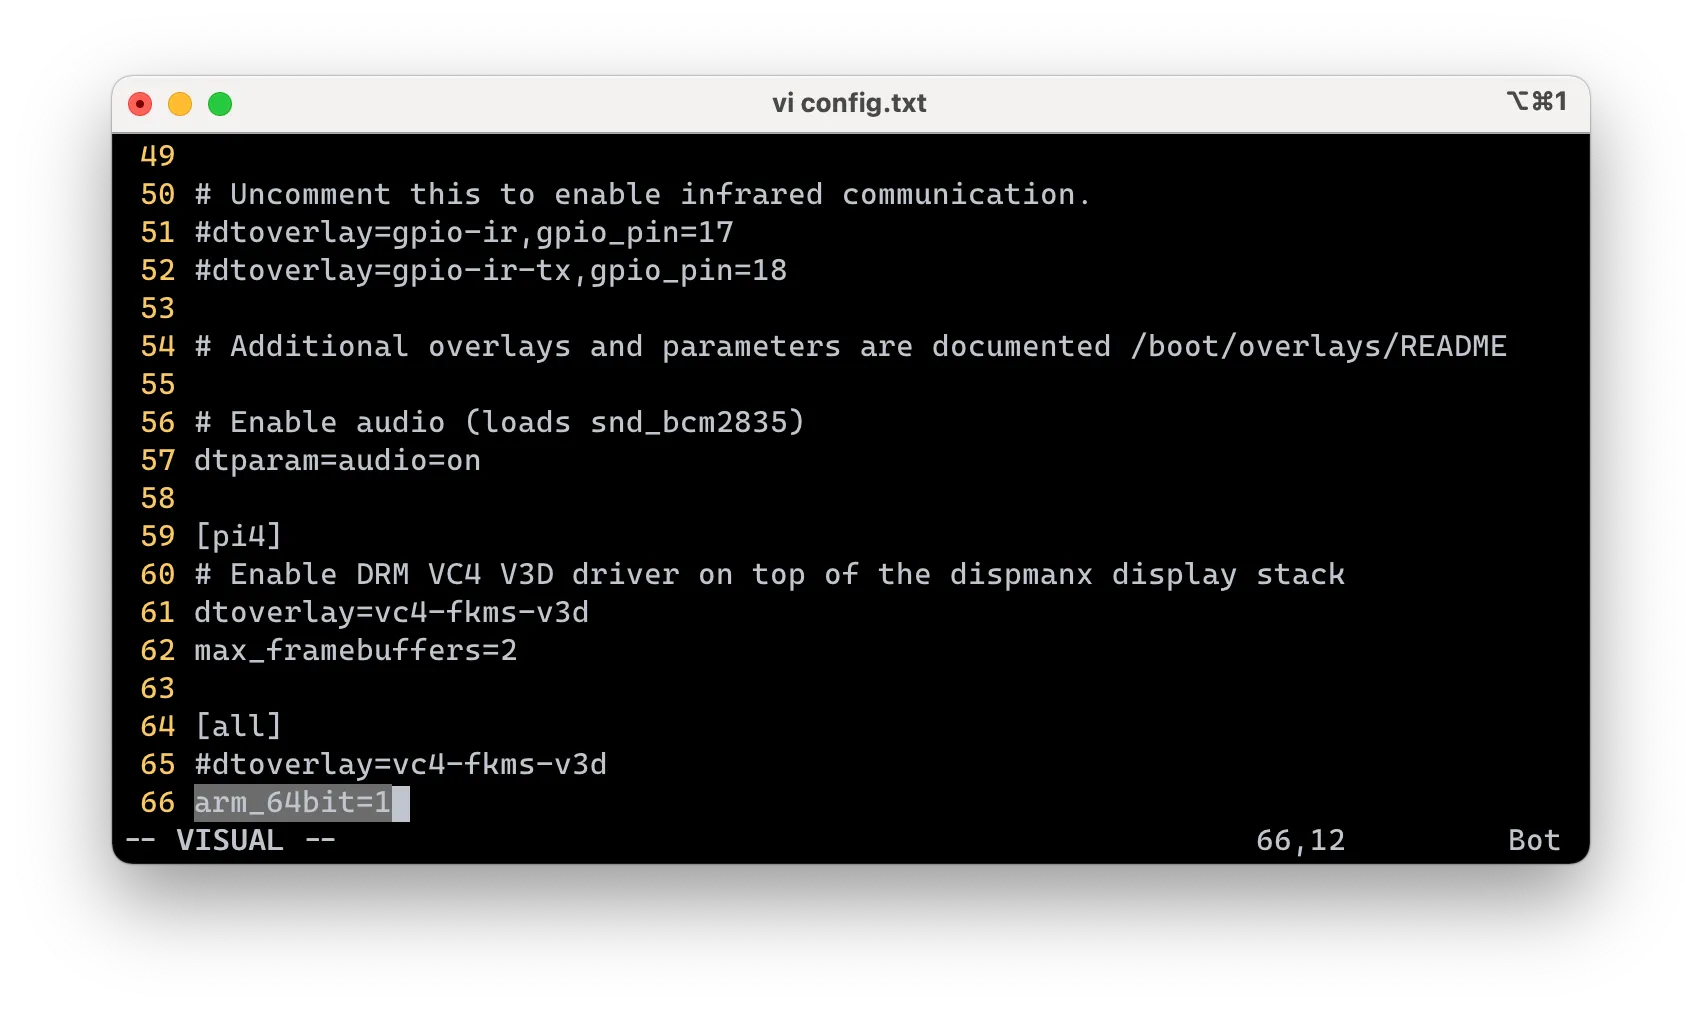
That’s it! Now insert the micro SD card to the Raspberry PI and boot it up.
Step 5 - Booting up
When you boot up the RPIs for the first time it will take a couple of minutes to appear on your home network.
If you log in to the router dashboard, you’ll be able to see the RPIs with their IP addresses.
You can log in to them via ssh like so.
ssh pi@10.0.0.100Note that pi is the default user and raspberry would be the default password.
💡 Make sure to change the default password with
passwdcommand when you log in for the first time to both nodes
Step 6 - Enabling static-IP configuration
When we boot up the RPIs K3S connects to the worker nodes by using their IPs. Since we will be using WLAN, if we restart our nodes, the IPs would be different and this setup would not work. So we need to add a piece of config to assign static IPs to them.
There are a couple of ways you can do this. Best option would be to use your router’s DHCP server capabilities and make an address reservation. You’d need the device name and MAC address of the RPIs.
If not, you can edit the /etc/dhcpcd.conf file and let the RPI know which IP to assign itself. I would recommend to add this just below “Example static IP configuration” section so that it’d be easier to find it in the future.
interface wlan0
static ip_address=10.0.0.100
static routers=10.0.0.1
static domain_name_servers=8.8.8.8
Once done, it would look like this.
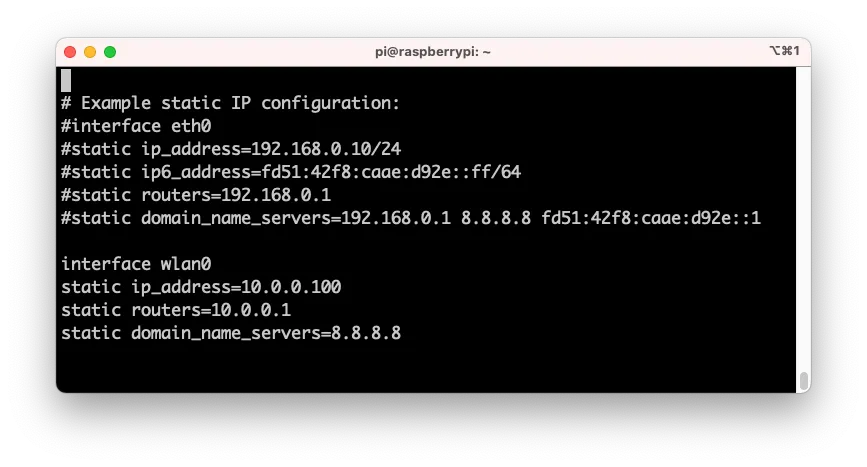
Make sure to update the IP addresses for each RPI.
Step 7 - Setup IP Tables
sudo iptables -F
sudo update-alternatives --set ip6tables /usr/sbin/ip6tables-legacy
Step 8 - Change the hostname to something sensible (Manual)
sudo vi /etc/hostnameThis file will only contain a single line, so you can name it something that makes sense to you. I renamed mine as controlplane for the master node and node01 for the worker node.
Next, change the /etc/hosts file where it says raspberrypi to the name of your node.
sudo vi /etc/hostsHere’s an example for the node01 node.
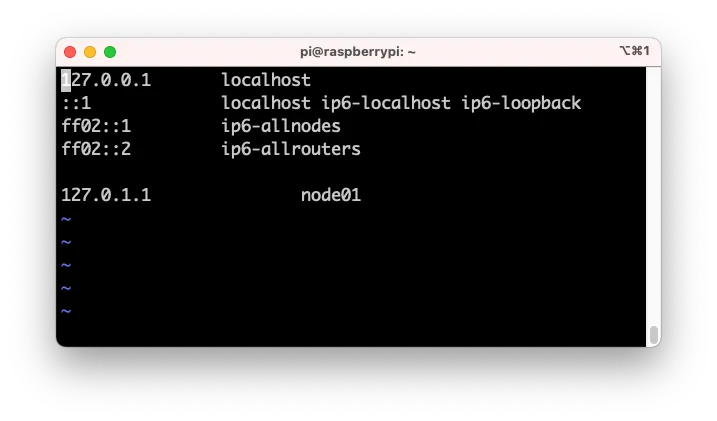
💡 Make sure to reboot the RPIs once you have done all these changes.
Step 9 - Installing K3S on the Master node
To install K3S on your master node, run the following command. It will do all the bootstrapping it needs to do under the hood.
curl -sfL https://get.k3s.io | sh -As a side note, I always run a sudo apt update && sudo apt upgrade before installing anything.
Step 10 - The worker node setup & agent registration
Before set up the worker node, we need to take the token from the server. You need to run the following commands on the master node in order to get this token.
sudo cat /var/lib/rancher/k3s/server/tokenThen you need run the following command on the worker node. Make sure to update them according to your environment.
curl -sfL https://get.k3s.io | K3S_NODE_NAME="node01" K3S_URL="https://10.0.0.100:6443" K3S_TOKEN="token from above step" sh -Explanation of the variables:
K3S_NODE_NAME- name of the worker node you are configuring. Remember that we set up the hostnames in step 7.K3S_URL- the IP address of your master node. The default K3S server port is 6443, so keep it unchanged.K3S_TOKEN- Token that we received from the from the K3S server. Eg:K10141483xxxxxxxxxx::server:xxxxxxxxxxxx
You’d see [INFO] systemd: Starting k3s-agent message and it’s ready to go!
That’s it! you can now run commands and see it in action. You will need to sudo su in order to run commands on the master node.
kubectl get nodes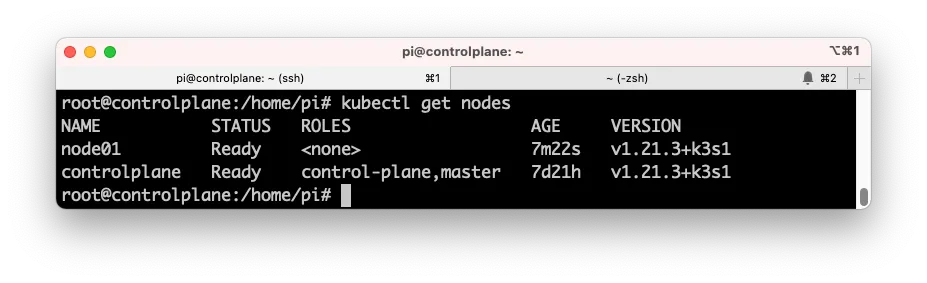
Conclusion
By the end of this article, I hope you have your k8s cluster up and running. If you ran into issues, let me know in the comments below. In the next article, we will look at deploying a sample application and see the cluster in action.
I did publish that automation in the end: automating Raspberry Pi K3s provisioning with Ansible replaces almost everything above with a playbook, which is worth having the second time you rebuild the cluster. Until next time 👋
References
- https://rancher.com/docs/k3s/latest/en/installation/install-options/server-config/
- https://rancher.com/docs/k3s/latest/en/installation/install-options/agent-config/
- https://www.electrondust.com/2017/11/25/setting-raspberry-pi-wifi-static-ip-raspbian-stretch-lite/
- https://thepihut.com/blogs/raspberry-pi-tutorials/19668676-renaming-your-raspberry-pi-the-hostname
- https://www.tomshardware.com/how-to/fix-cannot-currently-show-desktop-error-raspberry-pi