Building a Home Lab Kubernetes Cluster with Old Hardware and k3s
If you’ve read my previous post about building a Raspberry Pi k3s cluster, you know I’m a huge fan of home labs. There’s something uniquely satisfying about getting distributed systems running on a bunch of hardware you already own. This time, though, I wanted something a bit more powerful-a cluster that could handle not just learning and tinkering, but also heavier dev, CI/CD, and even ML workloads.
And as it turns out, there’s a ton you can do with a handful of old laptops, a simple switch, and Ubuntu Server. If you’re thinking about upgrading your home cluster or want to avoid vendor lock-in, this one’s for you.
Why Move From Raspberry Pi to x86?
Don’t get me wrong-RPi clusters are awesome for learning, hacking, and even some light home automation. But if you’ve ever tried running real dev pipelines, CI/CD, or any data-heavy ML stuff, you’ll hit those limits fast. Plus, WiFi can get a bit flaky when you’re trying to keep nodes connected under load.
I had a few spare laptops sitting around, and it made perfect sense to give them a second life and push them to their limits. Bonus: with Ethernet and a decent switch, you get much more reliable connectivity.
Network Setup: Keep It Simple (and Reliable)
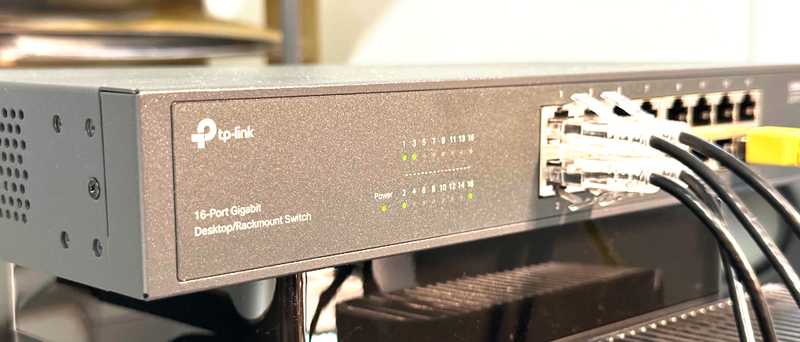
For this build, I kept things straightforward: all nodes are wired to a simple network switch. This gives much better performance and reliability compared to WiFi, but honestly, you could still pull this off over wireless if needed.
A quick tip:
- Reserve static IPs for each node using your router’s DHCP reservations.
- This makes node management, SSH, and Kubernetes networking so much easier.
- Check your DHCP table and make sure every machine has a unique, predictable IP address.
Getting Ubuntu Server Set Up on Each Node
Here’s a high level diagram of what my setup looks like:
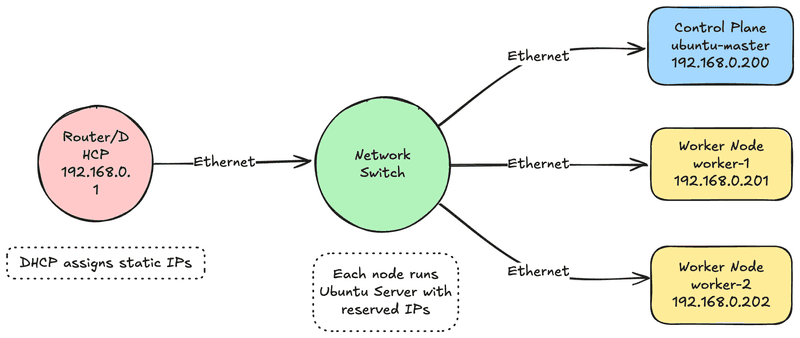
Let’s talk about prepping each machine. My old laptops had a new lease on life running Ubuntu Server. I recommend Ubuntu Server LTS for its simplicity and compatibility. If you’re using VMs, just make sure to set the NIC to bridged mode so each VM acts as a full member of your home LAN.
Here’s my go-to checklist for each node:
-
Update the system and install SSH:
sudo apt update && sudo apt upgrade -y sudo apt install openssh-server -y sudo systemctl enable ssh sudo systemctl start ssh -
Set a memorable hostname:
sudo hostnamectl set-hostname master # or worker-1, etc. -
(Optional) Update /etc/hosts for local resolution:
sudo nano /etc/hostsChange any lines like
127.0.1.1 old-hostnameto your new hostname. -
Find your node’s IP address:
ip aUse this IP for your DHCP reservation so it always stays the same.
-
Test SSH from another machine:
ssh <username>@<node-ip>
Installing k3s: Lightweight, Powerful, Familiar
This process feels pretty magical the first time you see it all come together. I stuck with k3s-lightweight and perfect for home or edge clusters.
On the Control Plane Node (“master”)
-
Install k3s:
curl -sfL https://get.k3s.io | sh - -
Check that k3s is running:
sudo systemctl status k3s -
Get your cluster join token:
sudo cat /var/lib/rancher/k3s/server/node-tokenCopy this somewhere safe-you’ll need it for your worker nodes.
-
Get the node’s LAN IP:
ip aLet’s say your master node IP is
192.168.0.200. -
Check your cluster status:
kubectl get nodes
If you ever want to reset/reinstall k3s, just run:
sudo /usr/local/bin/k3s-uninstall.shOn Each Worker Node (“worker-1”, “worker-2”, etc.)
-
Join the cluster:
curl -sfL https://get.k3s.io | K3S_URL=https://192.168.0.200:6443 K3S_TOKEN=<your-token-here> INSTALL_K3S_EXEC="--node-ip=<worker-ip>" sh -Replace
192.168.0.200with your control plane’s IP.
Replace<your-token-here>with the token from your master node.
Replace<worker-ip>with this worker’s IP, e.g.,192.168.0.201. -
That’s it! The node will auto-register with your cluster. No manual kubeconfig needed.
-
Check the cluster again from the master:
kubectl get nodesYou should see both
masterand your worker(s) asReady!
Troubleshooting and Gotchas
As with any home lab project, there are always a few snags-here’s what I ran into and how to fix it:
-
Node not joining?
- Double-check your token (no spaces, copy the whole thing).
- Make sure you can
pingthe control plane from your worker node. - Firewalls can get in the way. Ensure port 6443 is open between nodes.
- If you get hostname conflicts, just change the hostname and restart the k3s agent (
sudo systemctl restart k3s-agent).
-
Cluster state looks weird after hostname change?
- You might see both the old and new hostnames in
kubectl get nodes. Just delete the old one:kubectl delete node <old-node-name>
- You might see both the old and new hostnames in
-
IP address keeps changing?
- Make a DHCP reservation for each node’s MAC address in your router.
-
WiFi unreliable?
- Ethernet is always the best bet for clusters, especially for heavy workloads.
What’s Next?
With the basics in place, you’re ready to:
- Run and test real-world apps and dev environments
- Build your own CI/CD pipelines
- Experiment with ML workloads on dedicated nodes
This way, you get all the power of a real Kubernetes lab, but full control and no monthly surprises from a cloud provider.
Lessons Learned
- RPi clusters are great for edge computing and learning, but once you need real muscle, x86 hardware makes a huge difference.
- WiFi is convenient, but Ethernet is still king for stable clusters-especially if you’re doing anything performance-sensitive.
- Old laptops/desktops are a goldmine for home lab builds. Don’t let them collect dust!
Final Thoughts
If you have old machines and a bit of curiosity, you can build a cluster that’s surprisingly capable-no Raspberry Pis required.
And if you’ve already done it with RPis, this is the perfect upgrade path.
Keep an eye out for my next post where I’ll deep-dive into adding observability and tooling!
Happy clustering! 🫡